Web Scraping with Pydoll and GoProxy
Complete guide to web scraping with Pydoll—install, write your first scraper, bypass Cloudflare, rotate with GoProxy, and scale.
Jul 7, 2025
Discover how to effectively install, set up, and troubleshoot BP Proxy Switcher for optimal browsing. Learn about its features, common issues, and solutions for seamless proxy management.
Proxy SwitchySharp is a Chrome extension that facilitates the management of proxy settings within the browser. It allows users to easily switch between multiple proxies, enabling them to bypass geographical restrictions, enhance privacy, and optimize browsing performance. It provides several key features:
Users can create, modify, and delete various proxy profiles, each with its own server address, port number, and other customizable settings.
SwitchySharp enables users to define rules that associate specific websites or URLs with particular proxy profiles. When visiting matching websites, the extension automatically switches to the corresponding proxy.
The extension's toolbar icon provides a convenient way to manually switch between predefined proxy profiles with just a few clicks.
SwitchySharp can be configured to automatically switch proxies based on pre-set rules, providing a seamless browsing experience without manual intervention.
Users can lock certain proxy profiles to prevent automatic switches and ensure consistent use of a particular proxy server.
BP Proxy Switcher is conveniently accessible as an extension for popular web browsers such as Google Chrome, Mozilla Firefox, and others. To begin, ensure you have a compatible browser installed on your device. For demonstration purposes, let's focus on Chrome.
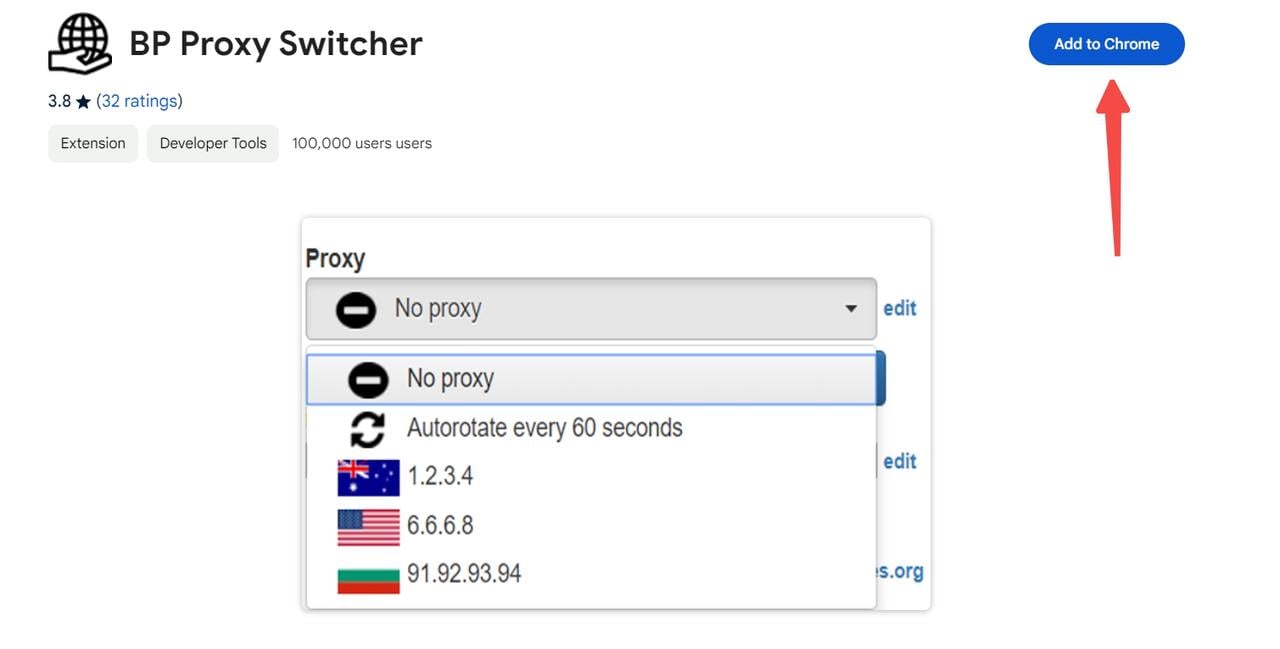
Find the official download page for "BP Proxy Switcher" in Google's Extended App Store. Click the "Add to Chrome" button to start the installation process.
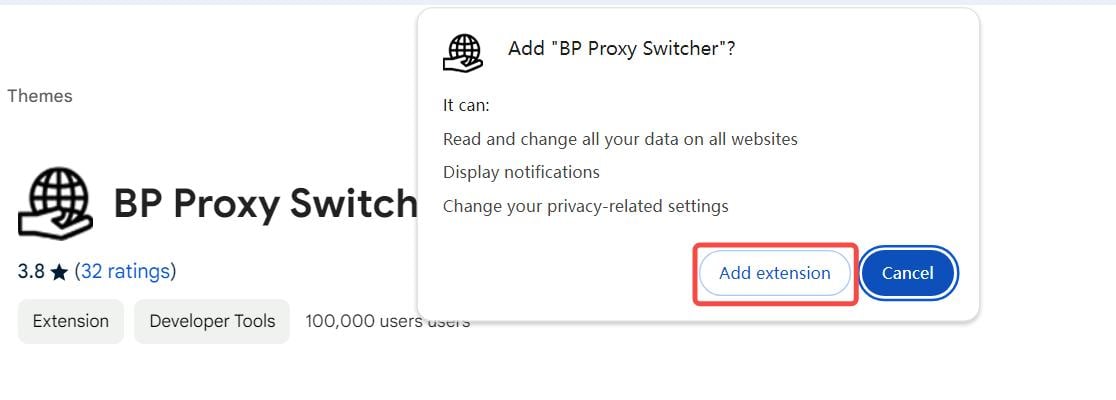
Click "Add Extension" in the pop up window.
Once the installation is complete, you will see a confirmation message, and the BP Proxy Switcher icon will appear in your browser’s extension toolbar. That means you have successfully installed BP Proxy Switcher!
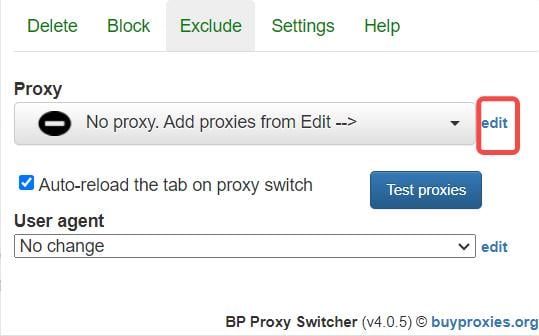
Navigate to the extension Settings. Click on the "BP Proxy Switcher icon" located in the browser extension toolbar. Then click "edit".
In the "Enter Proxies" interface, you can choose to manually enter proxy parameters or copy them from the clipboard for automatic configuration. If you choose to enter the proxies manually, don't forget to select the "Proxy Type" option.
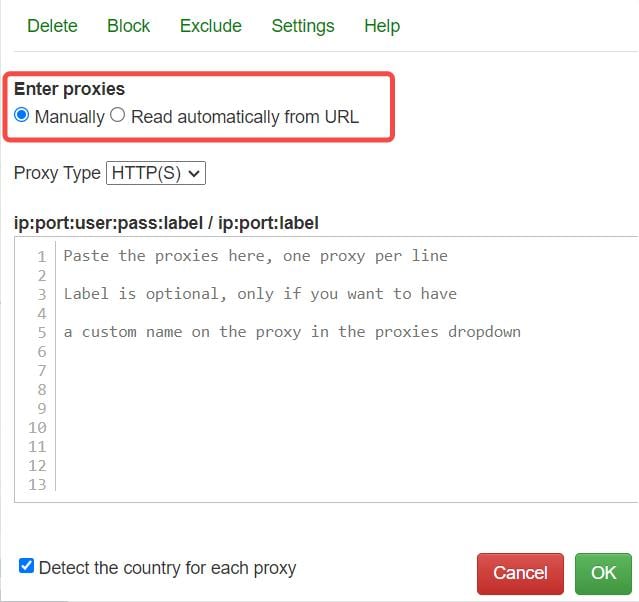
You must configure it in the format of [ip:port:user:pass:label] or [ip:port:label]. You can find all the information from the dashboard of your proxy service provider. Below, I will use GoProxy as an example.
GoProxy, based in Hong Kong, is a premier provider of top-tier proxy services, boasting a robust network sourced from leading Internet Service Providers like AT&T, Verizon, and Cogent Communications. This strategic aggregation of IP resources enables GoProxy to establish an extensive and high-quality proxy network, setting it apart in the realm of proxy service providers.
Functioning as an intermediary between users' devices and the websites they visit, GoProxy facilitates high-speed browsing, encryption, and the circumvention of censorship restrictions. The integration of BP Proxy Switcher with GoProxy further enhances users' browsing experience, allowing seamless switching between various proxy configurations, including those provided by GoProxy.
Start your journey with GoProxy through a risk-free, 7-day free trial. Explore our flexible pricing plans, starting at just $1.5 per GB.
socks5://customer-numsXYZ-country-ABC:[email protected]:30000
Once you've entered the proxy details, click "OK" to confirm and save the configuration.
After adding the new proxy, you can activate it by selecting it from the list of available proxies in the main interface of the extension.
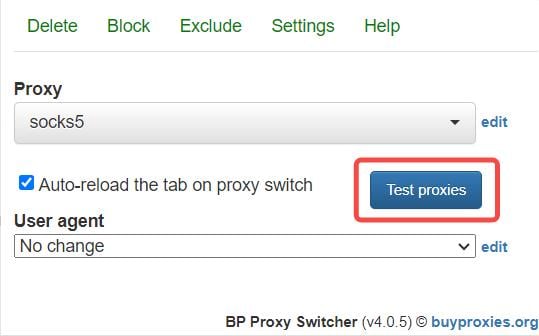
After setting up proxies and rules, it's crucial to test the connections. Activate a proxy and visit a website that displays your current IP address and location. This allows you to verify whether your proxy is functioning correctly. Once you have the extension set up and configured correctly, you’re ready to browse the Web more securely.
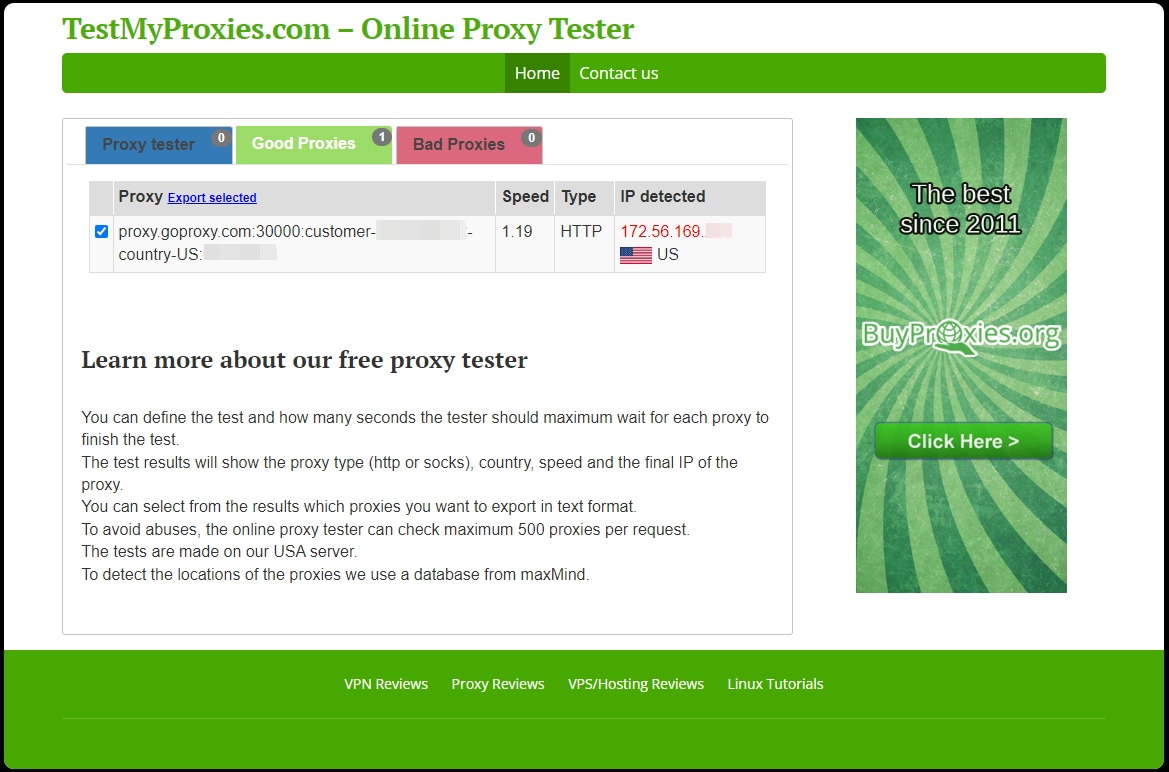
Ensure that the proxy settings in the BP Proxy Switcher extension are configured correctly, including the proxy type, address, and port. Verify that the proxies you have added are functioning properly and accessible.
Clearing the cache and cookies can help resolve any issues related to cached data interfering with the proxy connection.
If you are experiencing issues with a specific proxy server, try switching to a different one from your list to see if that resolves the problem.
Conflicts with other browser extensions or plugins can sometimes cause connection problems when using the BP Proxy Switcher. Try disabling any other extensions or add-ons you have installed and see if that resolves the issue.
In conclusion, BP Proxy Switcher stands out as a user-friendly and effective proxy management tool. By following the installation and setup steps outlined in this guide, users can harness the power of BP Proxy Switcher to enhance their online experience.
For an even more enhanced browsing experience, consider integrating GoProxy into your toolkit. As a premier provider of high-quality proxy services, GoProxy offers an extensive network sourced from top-tier Internet Service Providers, ensuring optimal performance and reliability. Elevate your online experience today with our no-risk, 7-day free trial. Feel free to reach out to us at support @goproxy.com or connect with us through Telegram.
< Previous
Next >
 Cancel anytime
 No credit card required